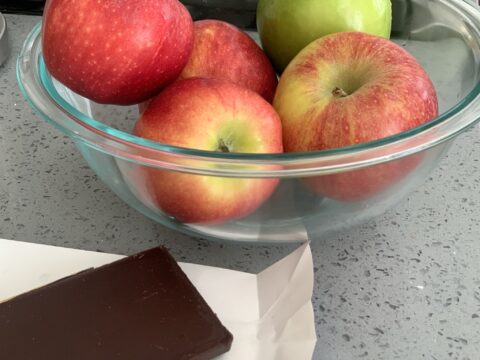
While trying to decide what delicious dessert to make next, my thought process went something like this: “Okay, what can my family enjoy as an after dinner treat that’s not ice cream or sorbet?” (We eat too much of that already)! Also, what can I make that is quick and easy that does not require too many ingredients? That’s when chocolate covered apples popped into my mind! I ran to the store and bought the sweetest apples I could find (plus one Granny Smith to see how well the chocolate would pair with the tangy taste), grabbed two dark chocolate truffle bars and that was it! (I chose dark chocolate because it’s good for your heart and my palate has become acquired to absolutely LOVE the taste of it)!
Serves: 4
Prep: 5 minutes
Cook: 20 minutes
- 2-3 apples (I used: Envy, Gala and Granny Smith)
- 2 dark chocolate bars, broken into pieces
- Optional: shredded coconut and granola
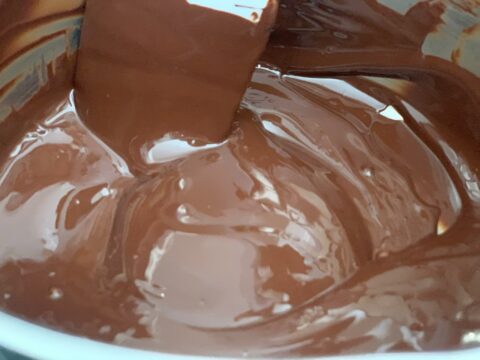
- To a large skillet over medium-low heat, melt the chocolate.
- Cut the apples and dip in the melted chocolate.
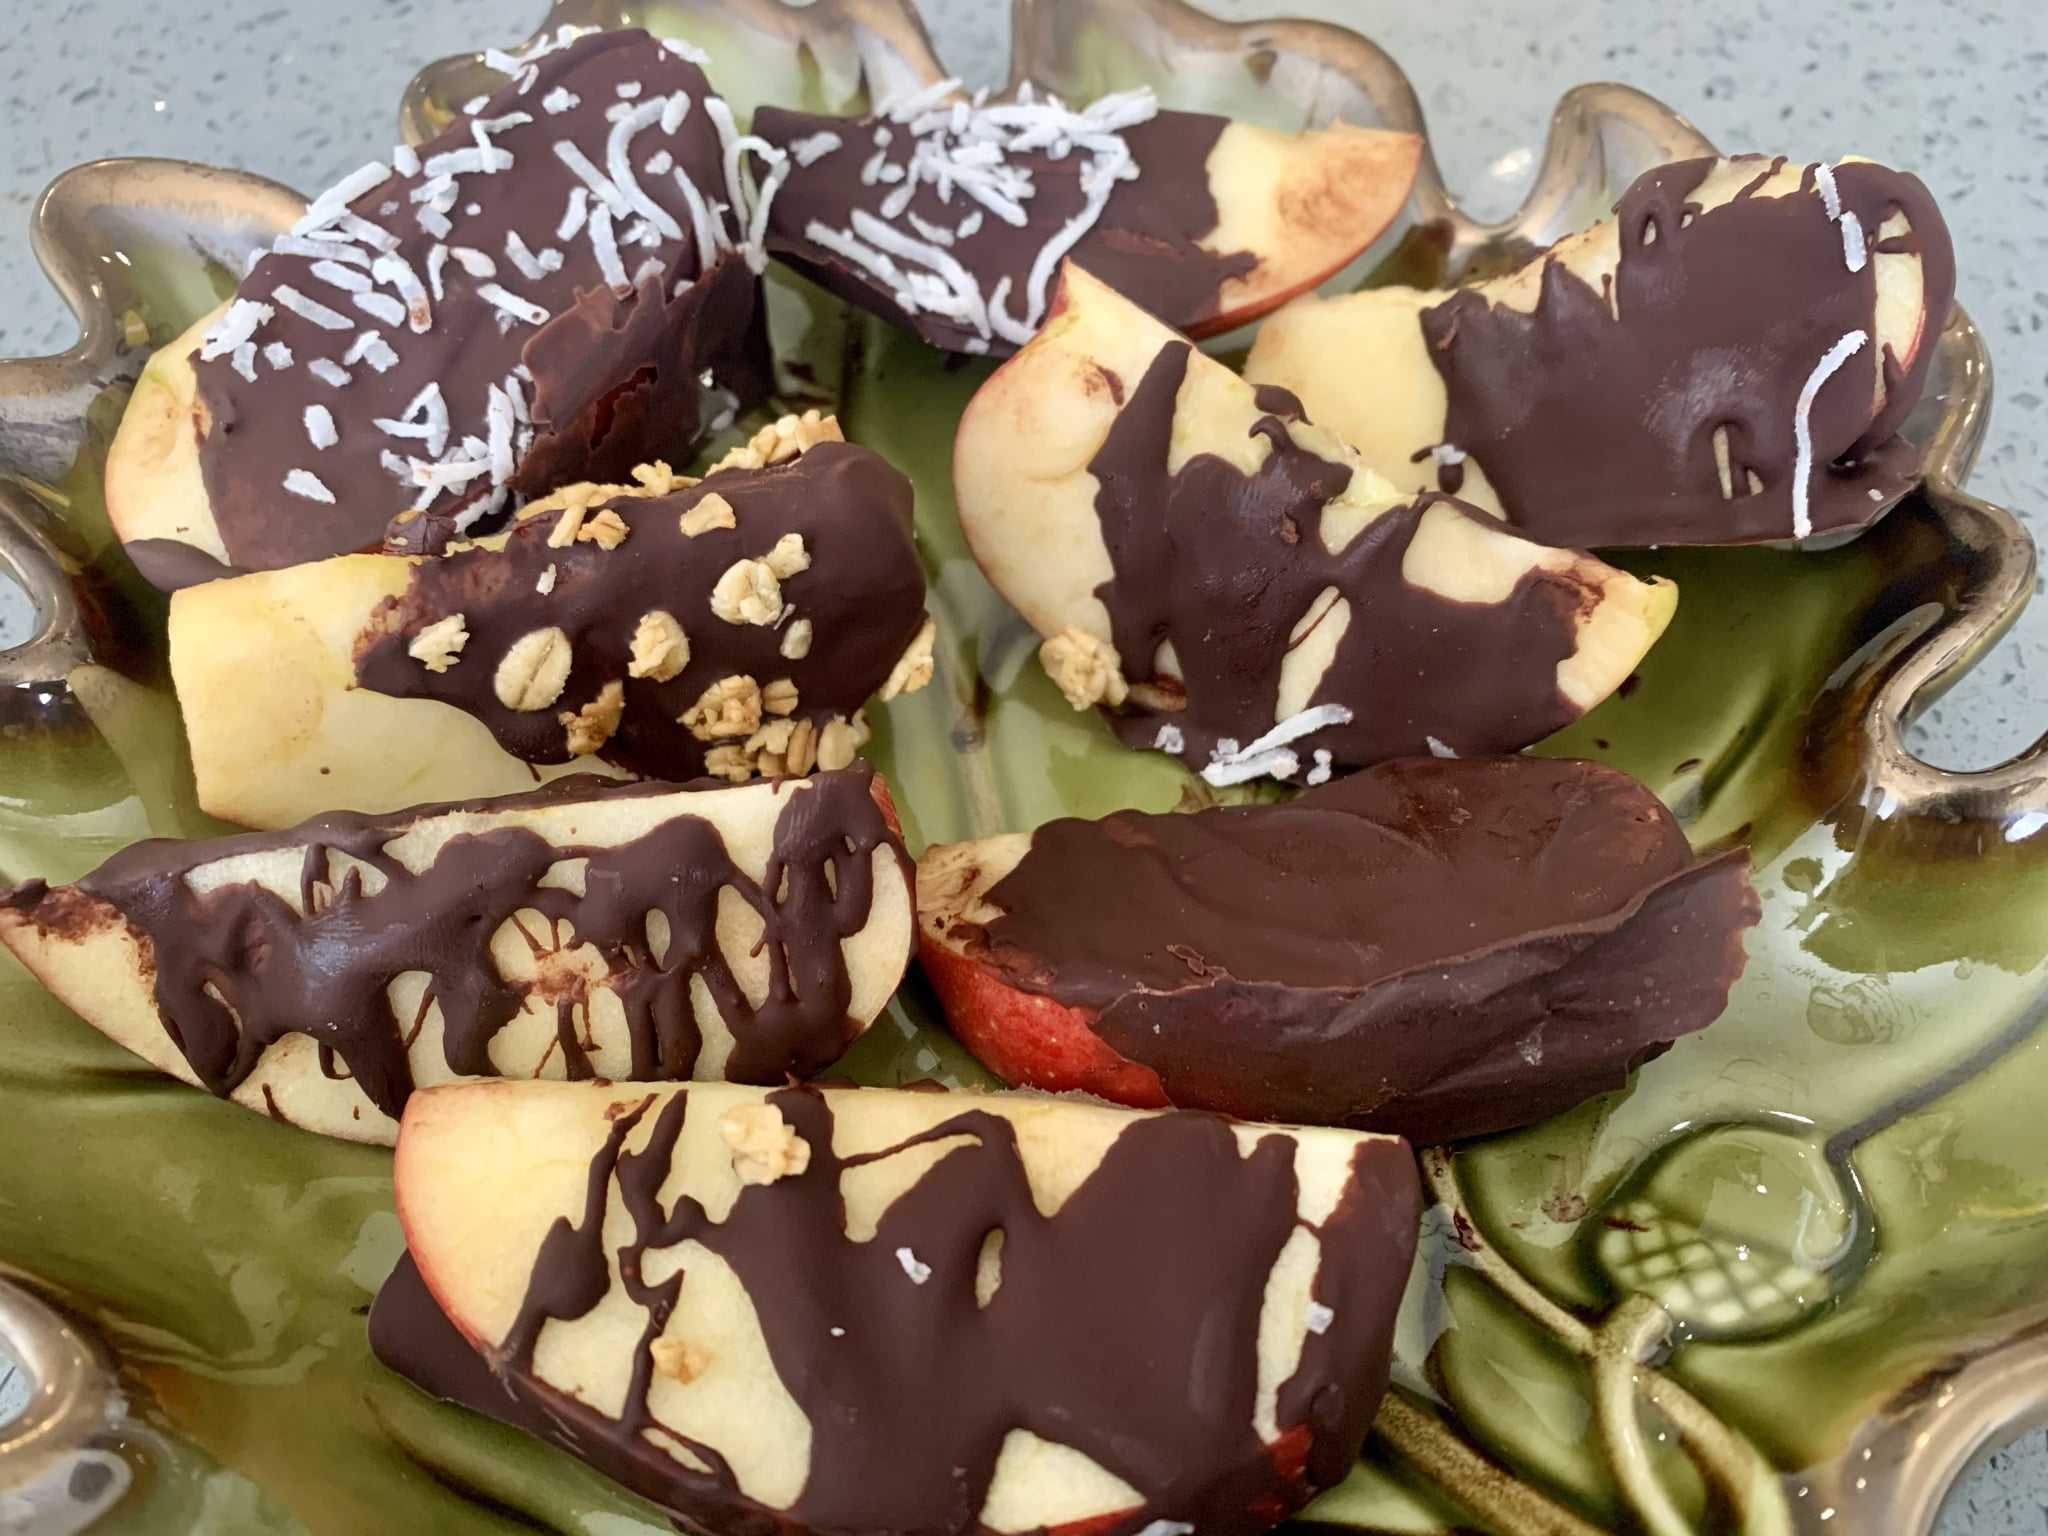
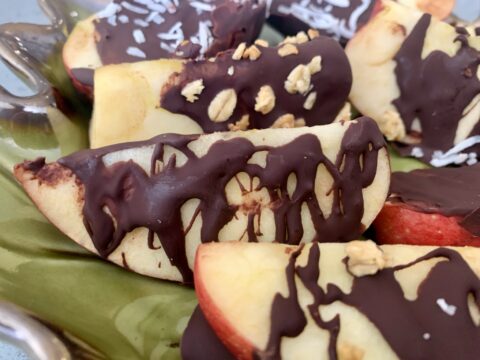
- Place on a parchment paper lined plate or baking tray and sprinkle on coconut or granola if you wish.
- Place in the refrigerator for 20 minutes or until the chocolate is set.
One of the aspects I love about this treat is if you absolutely wanted to, during the fall, you could go apple picking, and select your favorite fresh apples to later dip into melted chocolate! However, apples are delicious year-round. Just go to your local market and select your favorite kind. I used a few Envy and Gala apples for a sweet taste, and like I said before, one Granny Smith (anyone else just love the name of that green apple? Granny Smith. It reminds me of a grandma sitting on her front porch in a rocking chair during the summertime). How peaceful and comforting!
I did a little research before buying my fruit. I pulled up a chart that listed a variety of apples from sweet to tangy. I knew which taste I was going for and bought them accordingly. Once I was home slicing them up and tasting them along the way, I knew I made the right decision in the kind of apples I selected.
After I sliced them into wedges, I melted my chocolate. Two big bars of chocolate was more than enough! I broke them up into small pieces and kept it on low heat. Immediately it started to melt. That’s why you don’t want to turn it on high or even medium-high because the chocolate will start to burn. Stir with a spatula as the chocolate melts on low heat and bask in the aroma of it! You can use any color chocolate you want!
For me, just stirring the chocolate itself was so therapeutic. This was my favorite part! I know you’ll enjoy it too! If you have some left, pour it into molds and pop it in the fridge to use for later. Do I hear chocolate covered pears or oranges calling my name???
Once the chocolate is all melted, use your spatula, a spoon or fork and act as if you’re in art class! Drizzle it on those wedges however you want. Don’t worry about being perfect. Now for the last piece of information: do you have any coconut or granola in your fridge? If so, go ahead and sprinkle some on top of that melted chocolate. Any sprinkles? Use those too. No toppings? Do not worry, it will still be delicious. Trust me. Until the next recipe! Happy eating!